Effective summer cooling isn’t about high R-value insulation alone, but about mastering a complete thermal dynamics system.
- Radiant heat, not just air temperature, is the primary summer enemy that standard insulation often fails to block.
- Structural “thermal bridges” like wall studs can silently negate up to 50% of your insulation’s effectiveness, channeling heat directly inside.
Recommendation: Shift your focus from single-material solutions to ensuring the holistic integrity of your building envelope to achieve true climate resilience.
As our summers grow hotter, the question of keeping a home cool without relying on costly air conditioning becomes urgent. Many homeowners diligently check insulation R-values, believing a higher number is the silver bullet against heat. Yet, they find their upstairs rooms still bake in the July sun, and their energy bills remain stubbornly high. The conventional wisdom about insulation is proving inadequate for the realities of a warming climate.
The conversation often revolves around familiar materials like fiberglass or foam, and simple fixes like sealing window drafts. But what if these are just parts of a much larger puzzle? The uncomfortable truth is that heat doesn’t just seep through walls; it radiates from your roof, conducts through your home’s very structure, and flows in ways that a simple R-value rating completely ignores. We’ve been focused on stopping drafts when the real battle is against a more complex thermal dynamics system.
This is where a shift in perspective is critical. Instead of asking “which material is best?”, we must ask “how does my home function as a complete system against heat?” The key to a cool, resilient home lies not in a single product, but in understanding and controlling the three types of heat transfer. It’s about creating an integrated building envelope that actively manages heat, moisture, and time. This approach moves beyond simple material specifications to embrace a more holistic, climate-resilience design.
This article will deconstruct the common myths about summer insulation. We will explore why high R-value can fail, how to handle materials safely, and why some natural options outperform synthetics in damp climates. Most importantly, you will learn to identify the hidden structural weaknesses that sabotage your efforts and discover which renovations deliver both comfort and real financial value.
Summary: A Guide to Insulation for Summer Climate Resilience
- Why Does High R-Value Insulation Still Let Heat in During July?
- How to Handle Fiberglass Without Itching or Breathing Particles?
- Hemp Wool or Polystyrene: Which Lasts Longer in Damp Climates?
- The Stud Mistake That Reduces Insulation Efficiency by 40%
- How to Top Up Attic Insulation Without Removing the Old Layer?
- Why Does Your House Feel Drafty Even With the Windows Closed?
- How to Build a Wall That Breathes Using Hemp and Lime?
- Which Energy Renovations Actually Increase Resale Value?
Why Does High R-Value Insulation Still Let Heat in During July?
The most common misconception in insulation is that a high R-value guarantees summer comfort. R-value primarily measures resistance to conductive heat transfer—heat moving through a material. While crucial for winter, it fails to account for the primary source of summer heat gain: radiant heat. Your roof absorbs solar radiation and re-emits it downwards into your attic and living spaces, a process that standard insulation struggles to stop. This is why a well-insulated attic can still feel like an oven.
This is where the concept of thermal mass and decrement delay becomes paramount. Decrement delay is the time it takes for peak heat to travel from the outside of a material to the inside. Materials with high thermal mass, like dense-packed cellulose or wood fiber, absorb and slow down this heat wave. Instead of the 2 PM sun hitting your living space by 3 PM, the heat might not arrive until late evening, when outdoor temperatures have dropped and you can ventilate the house.
A compelling case study demonstrates this principle in action. On a day reaching 26.2°C, the surface of roof tiles soared to nearly 60°C. However, below a layer of wood fiber insulation, the temperature only hit 45°C. Crucially, the interior room temperature only nudged up to 17°C after midnight, thanks to the insulation’s 12-hour decrement delay. This proves that for summer performance, the ability to slow heat transfer over time is just as important, if not more so, than simply resisting it. Bubble insulation with 96% reflectivity is another strategy, as it directly reflects radiant heat, preventing it from being absorbed in the first place.
Therefore, a climate-resilient insulation strategy for summer must be a two-pronged attack: reflecting radiant heat and using materials with a high decrement delay to slow down what gets through. Relying on R-value alone is like building a fortress with a single, easily bypassed wall.
How to Handle Fiberglass Without Itching or Breathing Particles?
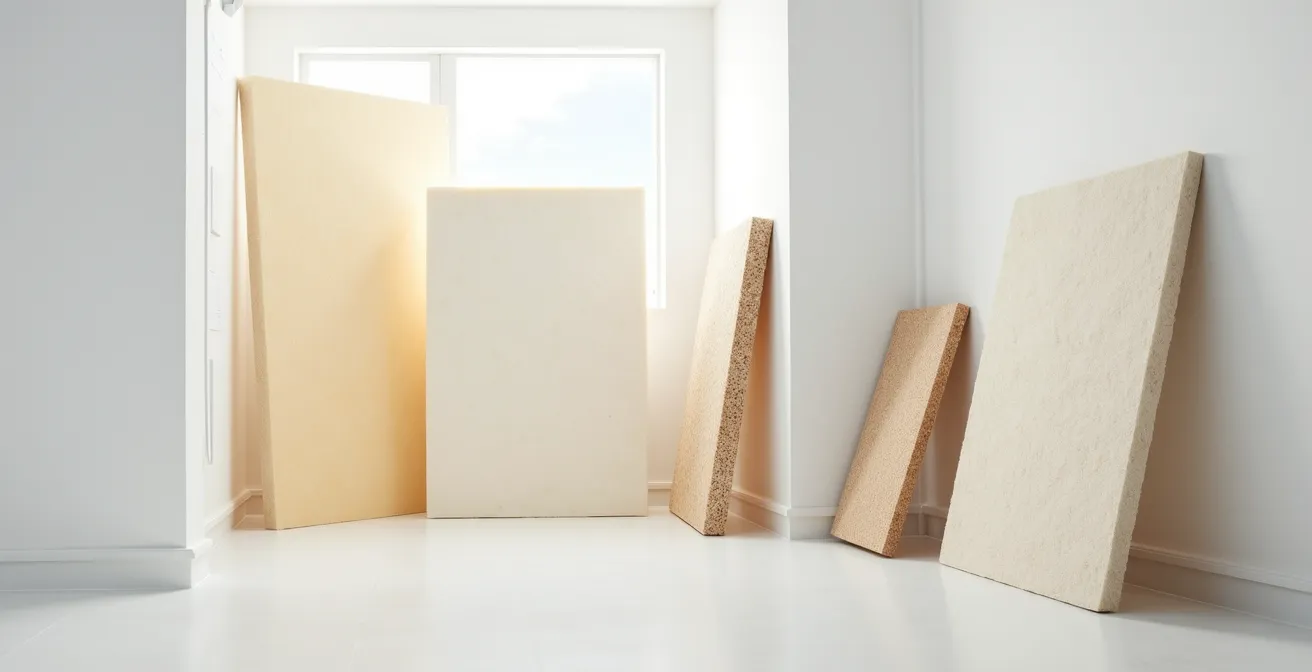
Fiberglass remains a popular and cost-effective insulation choice, often containing 20-30% recycled glass content. However, its reputation for causing skin irritation and respiratory concerns is well-deserved. The material consists of extremely fine glass fibers that can easily become airborne during installation and lodge in skin or be inhaled. Handling it improperly is not just uncomfortable; it’s a health risk. Fortunately, professional techniques can dramatically mitigate these issues.
The primary goal is containment. You must treat the work area like a cleanroom in reverse, preventing any particles from escaping into the rest of the house. This involves more than just wearing a basic dust mask and gloves. It requires a systemic approach to air control and personal protective equipment (PPE). Sealing off the area, managing airflow, and using specialized cleanup tools are non-negotiable for a safe installation.
When possible, opting for encapsulated fiberglass batts is a smart first step. These products come sealed in a plastic vapor barrier, which minimizes fiber release during handling. However, for loose-fill applications or standard batts, a strict protocol is essential for protecting yourself and your home’s air quality.
Your Safety Checklist for Fiberglass Installation
- Wear full PPE: This includes disposable coveralls, non-vented goggles, gloves, and a NIOSH-approved respirator (not just a paper mask).
- Seal the work area: Use 6-mil plastic sheeting and painter’s tape to completely isolate the room or attic from the rest of the house, including covering vents.
- Control airflow: Create negative air pressure by placing a box fan in a window, securely sealed, to exhaust air to the outside. This draws fibers away from you and prevents them from spreading.
- Prepare your skin: Applying baby powder or cornstarch to exposed skin areas like the neck and wrists can help prevent fibers from sticking.
- Clean with care: Never use a standard shop vacuum or broom, which will just blow the fine particles everywhere. Use a vacuum equipped with a HEPA filter for all cleanup. After finishing, shower in cold water first to close your pores before washing with warm water.
By adopting these methods, you can leverage the thermal performance of fiberglass without compromising your health, ensuring the project improves your home’s comfort in every sense of the word.
Hemp Wool or Polystyrene: Which Lasts Longer in Damp Climates?
When choosing insulation for a climate with high humidity or rainfall, long-term performance is directly tied to how a material manages moisture. This is where two very different materials, natural hemp wool and synthetic polystyrene, reveal their fundamentally opposing philosophies. Polystyrene is designed to block moisture entirely, while hemp wool is designed to breathe with it. In a damp climate, the “breathing” approach often proves more resilient.
Polystyrene (XPS) is a closed-cell foam, making it highly resistant to moisture absorption and known for its durability. It acts as a vapor barrier, which seems ideal. However, this creates a significant risk. If moisture finds its way behind or around the foam panels through even a tiny installation gap, it becomes trapped. This trapped moisture can lead to a significant drop in R-value and, more dangerously, can cause rot and mold in the building’s structure. It creates a durable, but unforgiving, system.

Hemp wool, on the other hand, is vapor permeable and hygroscopic. This means it can absorb excess moisture from the air when humidity is high and release it when humidity drops, a process known as “hygroscopic buffering.” Rather than trapping water, it actively manages it, helping to regulate indoor humidity and prevent condensation. This “breathing” capability makes it far more forgiving of the imperfections inherent in any real-world building envelope and helps protect the wooden structures it often insulates. While both materials can have a long lifespan, hemp’s ability to manage moisture gives it a distinct advantage in maintaining its thermal performance over decades in damp conditions.
This comparison table highlights the key differences in their approach to moisture, which is the determining factor for longevity in a damp environment.
| Property | Hemp Wool | Polystyrene (XPS) |
|---|---|---|
| Moisture Management | Vapor permeable – ‘breathes’ | Closed-cell structure highly resistant to moisture absorption |
| Hygroscopic Buffering | Actively regulates humidity | No buffering capacity |
| R-Value Retention When Damp | Maintains performance | Drops significantly if moisture gets around it |
| Lifespan | 30+ years with proper installation | Known for strength and durability, can withstand heavy loads, long lifespan ensures sustained thermal performance |
| Mold Resistance | Natural resistance when treated | Does not support mold growth |
For a climate-resilient home in a damp region, choosing an insulation that works with moisture, rather than one that creates a potential trap for it, is the more forward-thinking and safer long-term strategy.
The Stud Mistake That Reduces Insulation Efficiency by 40%
One of the most significant and overlooked flaws in a home’s thermal defense is the thermal bridge. You can install the most expensive, highest R-value insulation in your walls, but if it’s interrupted by wooden or metal studs, you are creating thermal highways that allow heat to bypass the insulation completely. Wood has a much lower R-value than insulation, and metal is an excellent conductor. This structural mistake effectively undermines your entire investment in insulation.
The impact is not trivial. Research shows that a material’s stated R-value can be reduced by as much as 50% once it’s placed in a standard wall cavity between studs. More alarmingly, studies on residential buildings have demonstrated that energy loss caused by thermal bridges can account for approximately 40% of the total annual energy needs. In summer, this means heat is conducted directly from the hot exterior sheathing, through the studs, and into your interior drywall, rendering the insulation in the bay far less effective.
This is a classic example of a systemic weakness. The performance of the wall is not the sum of its parts; it is dictated by its weakest link. To build a truly efficient and resilient envelope, you must address these thermal bridges directly using advanced framing techniques and continuous exterior insulation. These methods are not just marginal gains; they are fundamental to achieving the advertised performance of your insulation.
Plan d’action : Audit de vos ponts thermiques
- Points de contact : Listez tous les points où les matériaux de structure (bois, métal, béton) traversent votre couche d’isolation. Pensez aux montants de mur, solives de plancher, balcons et jonctions de fondation.
- Collecte : Utilisez une caméra thermique en hiver ou en été pour visualiser les différences de température. Prenez des photos des “rayures” froides ou chaudes qui indiquent l’emplacement des montants.
- Cohérence : Comparez les zones de ponts thermiques identifiées avec les plans de votre maison. Sont-ils dus à une charpente standard (16 pouces au centre) ou à des éléments de conception spécifiques (balcons en porte-à-faux) ?
- Mémorabilité/émotion : Identifiez les 3 ponts thermiques qui ont le plus grand impact sur votre confort (par exemple, le mur froid derrière votre canapé, le sol glacé au-dessus du garage). Cela crée une priorité émotionnelle pour l’action.
- Plan d’intégration : Établissez une liste de solutions prioritaires. Cela pourrait inclure l’ajout d’une isolation extérieure continue lors d’un futur changement de revêtement ou l’application de techniques de charpente avancée pour une nouvelle construction.
Ignoring thermal bridging is like leaving a window open while the AC is running. By focusing on the integrity of the entire building envelope, you move from simply insulating to creating a genuinely high-performance, climate-resilient home.
How to Top Up Attic Insulation Without Removing the Old Layer?
One of the most effective energy upgrades for summer comfort is improving attic insulation, a space where temperatures can be extreme. On a hot day, attics can easily reach 150 degrees or more as the sun beats down on the roof. If you can see the tops of your floor joists, it’s a clear sign you don’t have enough insulation to combat this heat. The good news is that you can almost always add new insulation directly over the old layer, provided the existing material is dry and free of mold.
The process is more than just dumping new material on top. The first and most critical step is air sealing. Before adding a single inch of new insulation, you must seal all the gaps that allow warm, moist air from your living space to enter the attic. This includes gaps around light fixtures, plumbing vents, electrical wires, and the attic hatch itself. Sealing these leaks prevents condensation in the winter and stops the “stack effect” from drawing hot attic air into your home in the summer.

When adding the new layer, it’s vital to use unfaced insulation. If your existing insulation has a kraft paper backing (a vapor barrier), it should be facing down towards the heated living space. Never place a new layer with a vapor barrier on top of old insulation, as this will trap moisture between the two layers. Loose-fill insulation (cellulose or fiberglass) is often the best choice for a top-up project because it fills gaps and conforms seamlessly around joists and the old insulation layer, creating a monolithic blanket of protection. Your goal is to achieve a total thickness of 13-20 inches to meet modern building codes and create a robust thermal barrier.
Don’t forget the attic hatch itself; an uninsulated hatch is a giant thermal hole in your ceiling. By combining thorough air sealing with a thick new layer of insulation, you can transform your attic from a heat source into a protective buffer for your home.
Why Does Your House Feel Drafty Even With the Windows Closed?
That persistent feeling of a draft, or a room that’s inexplicably stuffy and hot in the summer, is often not due to a leaky window. Instead, it’s caused by a powerful, invisible force known as the stack effect, combined with countless hidden air leaks throughout your building envelope. In winter, the stack effect pulls cold air in through low points (like the basement) and pushes warm air out through high points (the attic). But in summer, it works in reverse.
When it’s hot outside, the intense heat absorbed by your roof creates a pocket of superheated air in the attic. Your air-conditioned house is now the “cool” zone. The laws of physics dictate that this extreme heat will actively try to enter your cooler living space. It gets pulled down through any available pathway—recessed lighting, attic hatches, and gaps around plumbing or wiring. This creates that stuffy, “reverse draft” feeling on the top floor and makes it impossible for your AC to keep up.
The solution is a meticulous hunt for these hidden air leaks. While windows and doors are the obvious culprits, the most significant leaks are often in places you’d never think to look. These small, individual gaps collectively act like a giant, open hole in your home’s defenses, allowing uncontrolled air exchange that sabotages both comfort and energy efficiency. Sealing these penetrations is one of the most cost-effective ways to improve your home’s performance.
Here are some of the most common hidden air leak locations:
- Recessed Lighting: Older “can” lights are notoriously leaky. They should be replaced with airtight IC-rated fixtures or covered with special airtight boxes in the attic.
- Electrical Outlets: Outlets and switch plates on exterior walls are direct pathways for air. Simple foam gaskets installed behind the faceplates can seal them effectively.
- Attic Hatch: An unsealed attic hatch is a massive source of air leakage. Applying foam weatherstripping around the perimeter is essential.
- Basement Rim Joist: The area where the house framing meets the concrete foundation is a major source of infiltration. This gap should be sealed with foam or caulk.
- Plumbing and Chimney Penetrations: Gaps around pipes, vents, and chimneys as they pass through floors and ceilings must be sealed with appropriate fire-rated sealant.
By shifting your focus from obvious drafts to the home’s entire systemic integrity, you can finally gain control over its thermal performance and create a truly comfortable, sealed environment.
How to Build a Wall That Breathes Using Hemp and Lime?
The concept of a “breathing wall” represents a fundamental shift away from the modern practice of sealing buildings in plastic. Instead of creating an impermeable barrier, this approach uses natural materials like hemp and lime (hempcrete) or cellulose to create a wall system that actively manages moisture and heat. This is not “drafty” construction; it is a sophisticated, hygrothermal design that contributes to a healthier indoor environment and a more resilient structure.
Materials like cellulose, which is often made from 82-85% recycled paper, excel at this. Cellulose fibers have the natural ability to absorb moisture from the air when humidity is high and release it when the air is drier. This buffering action helps to stabilize indoor humidity levels, preventing the clammy feeling of high humidity in the summer and the dry air of winter. By managing moisture, it also drastically reduces the risk of condensation forming within the wall cavity, which is a primary cause of mold growth and rot.
When combined with lime plaster, hemp wool (hempcrete) creates an even more robust breathing wall system. Lime is naturally vapor-permeable, antimicrobial, and has excellent durability. The hemp provides the insulation and thermal mass, while the lime provides a protective, breathable skin. This combination creates a monolithic wall that has no layers to trap moisture, no plastic vapor barriers to fail, and an inherent ability to regulate the indoor climate.
This approach moves beyond the simple metrics of R-value to embrace a more holistic view of building performance. A breathing wall contributes to superior indoor air quality, protects the building’s structure from moisture damage, and provides exceptional thermal comfort through the combination of insulation and thermal mass. It’s a return to traditional principles, enhanced by modern building science, to create homes that are both healthy and highly efficient.
In an era of increasing concern over indoor air quality and the long-term durability of buildings, designing walls that breathe is a forward-thinking strategy for creating truly sustainable and resilient homes.
Key Takeaways
- Summer comfort depends more on managing radiant heat and slowing heat transfer (decrement delay) than on R-value alone.
- Hidden structural flaws like thermal bridges can negate up to 40% of an insulation’s effectiveness and must be addressed systemically.
- In damp climates, moisture-managing (“breathing”) materials like hemp or cellulose often outperform moisture-blocking materials like polystyrene in the long run.
Which Energy Renovations Actually Increase Resale Value?
Not all energy renovations are created equal when it comes to boosting your home’s resale value. While comfort and lower utility bills are immediate benefits, translating those gains into a higher asking price requires a strategic approach. Buyers are increasingly savvy about energy efficiency, but they need clear, documented proof of performance, not just vague claims of “eco-friendly” features.
The most valuable renovations are those that provide a quantifiable return. Proper insulation is a prime example. Well-insulated homes can see a 15-30% reduction in cooling costs, and this is a powerful selling point. The key is to document this performance. Keep a detailed history of your utility bills before and after the renovation to show the concrete savings. Furthermore, obtaining a post-renovation energy audit report provides a third-party, expert validation of the home’s improved efficiency.
Beyond the numbers, focus on renovations that improve tangible comfort. Being able to highlight that “the second floor no longer gets hot in the summer” is a benefit every potential buyer in a warming climate can immediately understand and value. The choice of materials also plays a role. Using sustainable, natural materials like cork, cellulose, or sheep’s wool can appeal to environmentally conscious buyers and add to the story of a “green” and healthy home. Pursuing a formal green building certification (like LEED or Passive House) is the ultimate way to codify this value, providing a trusted benchmark for the market.
Ultimately, increasing resale value is about marketing your home’s performance and resilience. It’s about selling not just a house, but a system that provides lower running costs, superior comfort, and a healthier living environment. A well-documented, high-performance building envelope is an asset that speaks directly to the concerns of the modern homebuyer.
To put these principles into practice, your next step should be to conduct a comprehensive energy audit to identify the specific upgrades that will deliver the greatest performance and value for your unique home.